TWhatsApp Setup Guide
Step-by-step guide to go from zero to your first WhatsApp message sent with TWhatsApp. The whole Meta-side setup takes about 15 minutes and needs no business verification and no app review while you test with your own phone number.
1. Create your Meta app
Go to developers.facebook.com
and sign in with your Facebook account. Open My apps (top right) and choose
Create app. Give it a name, for example FWH, and finish the wizard.
Once created, open App settings > Basic in the left menu. This page shows your App ID - you will not need it for TWhatsApp, but it identifies the app:
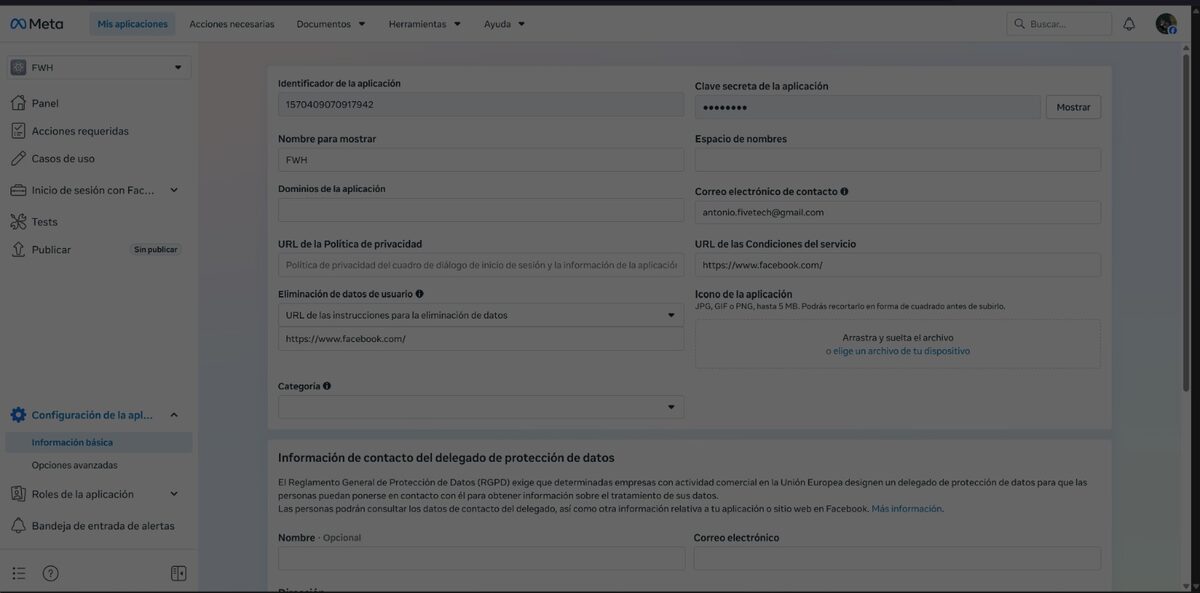
Note: Meta shows a 15-app warning on brand-new unverified developer accounts. If you have an older account you can usually create the app anyway, as in this example.
2. Add the WhatsApp use case
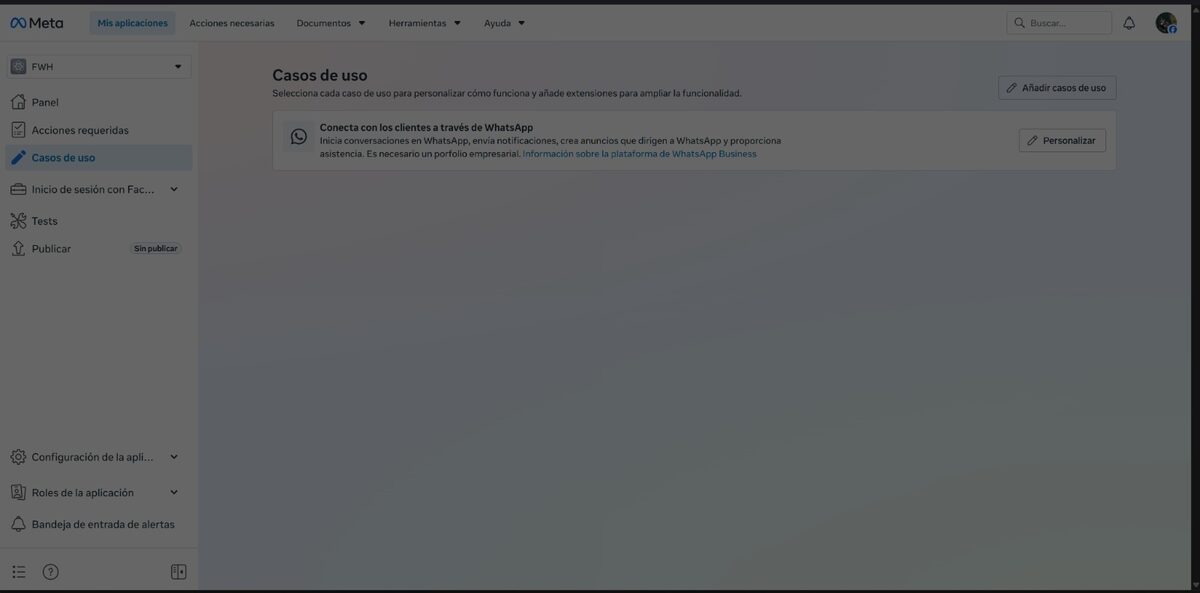
In the app's left menu open Use cases (Casos de uso), click Add use cases and add "Connect with customers through WhatsApp" (Conecta con los clientes a través de WhatsApp). Then press Customize (Personalizar) on that use case:
3. Get your token and Phone Number ID
Inside the WhatsApp use case, the left menu shows a Basic setup (Configuración básica) group. When asked for an integration type, choose Integrate with the API (Integrar con API):
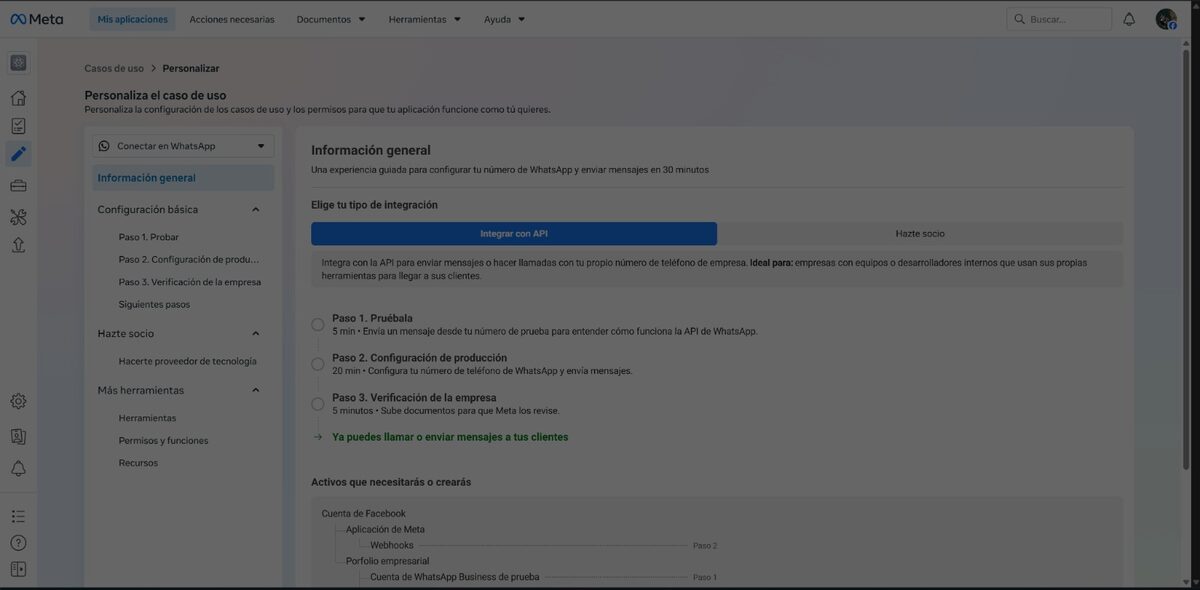
Open Step 1. Test (Paso 1. Probar). This screen has everything TWhatsApp needs:
- Temporary access token - valid for 24 hours. This is your
cToken. - Phone number ID - the numeric ID of the test sender number. This is your
cPhoneId. - Test sender - a Meta-owned number (
+1 555 xxx xxxx) your messages come from while testing. - Recipient - add your own phone number here and confirm it with the SMS code Meta sends you. In test mode you can only message registered recipients.
Keep the token to yourself. Never paste it into chats or emails: copy it straight into a password manager, or directly into your test program on your PC. If one leaks, generate a new one on the same screen and discard the old.
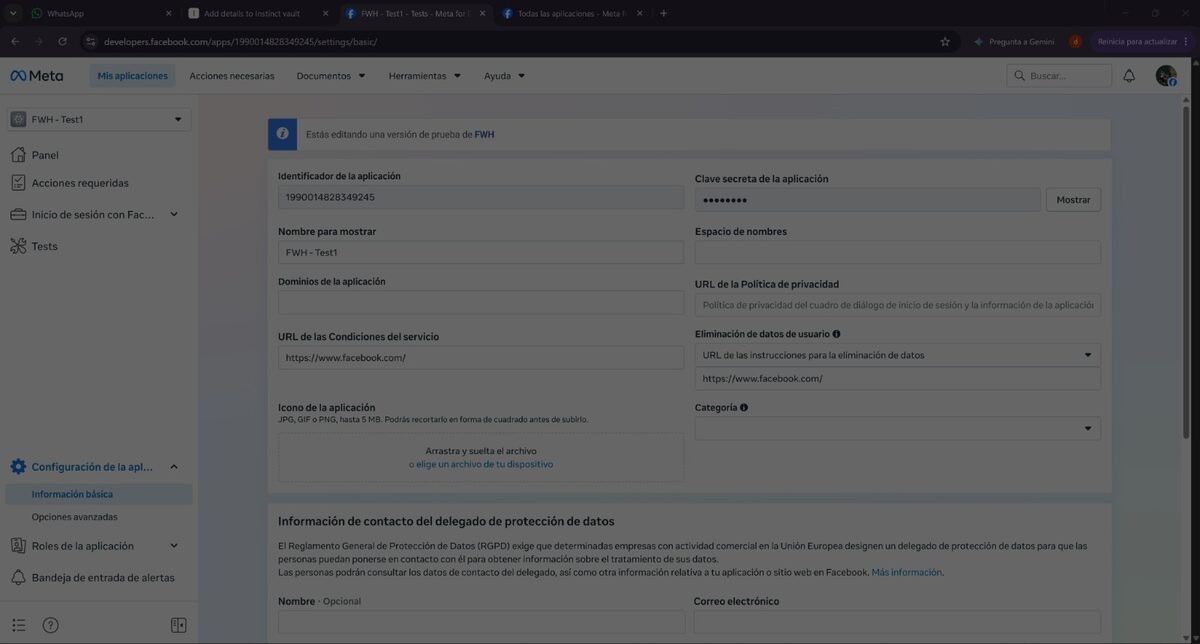
Optional: Meta also creates a test version of your app (<your app> - Test1)
with its own settings page. You can use it to experiment without touching the main app:
4. Send the test message from Meta's page
Still on Step 1. Test, press Meta's own Send message
(Enviar mensaje) button. Meta delivers a hello_world template message from
the test sender to your registered number. If it arrives, your app, sender and recipient are all
working - everything left happens in your code.
5. Send from Harbour with TWhatsApp
On your PC, open the FWH sample at samples/whatsapp/twhatsapp.prg and set your two
values:
oWhatsApp := TWhatsApp():New()
oWhatsApp:cToken   := "PASTE-YOUR-TOKEN-HERE"       // temporary token from Step 1
oWhatsApp:cPhoneId := "PASTE-YOUR-PHONE-NUMBER-ID"  // phone number ID from Step 1

oWhatsApp:SendText( "34600000000", "Hello from FiveWin!" )
Build and run the sample. The message leaves from your own Harbour code - that is the moment it gets real. For the full member reference see the TWhatsApp class page.
6. Next steps
- Permanent token: the temporary token expires in 24 hours. For production,
create a system user in Meta Business Settings, assign it the app and the WhatsApp
assets, and generate a permanent access token with the
whatsapp_business_messagingpermission. - Your own sender number: step 2 of the Basic setup (Configuración de producción) registers your business number and display name.
- Business verification: only needed to message arbitrary users at scale (step 3). Testing with your own registered numbers works without it.
- Smoother onboarding for your users: if you ship FWH applications to your own customers, look into becoming a Meta Tech Provider: Embedded Signup lets your users do this whole setup with a couple of clicks from your app, instead of walking through the Meta panel by hand.